 |
IPSDK 4.2
IPSDK : Image Processing Software Development Kit
|
|
IPSDK 4.2
IPSDK : Image Processing Software Development Kit
|
The fibers analysis plugin is designed to detect, separate, and analyze fibers in 2D and 3D. It is accessible via one dedicated button, inside the menu bar of IPSDK Explorer.

The plugin window contains two dropdown menus at the top left corner to select input images and binary input images of fibers to process. Only binary images will appear inside the first dropdown list. For the input images list, both grayscale and RGB formats are supported, for individual 2D images, and 3D images.

When using a binary image as input, the pre process and the binarization sections can't be accessed inside the plugin, considering the detection of the fibers is already done.

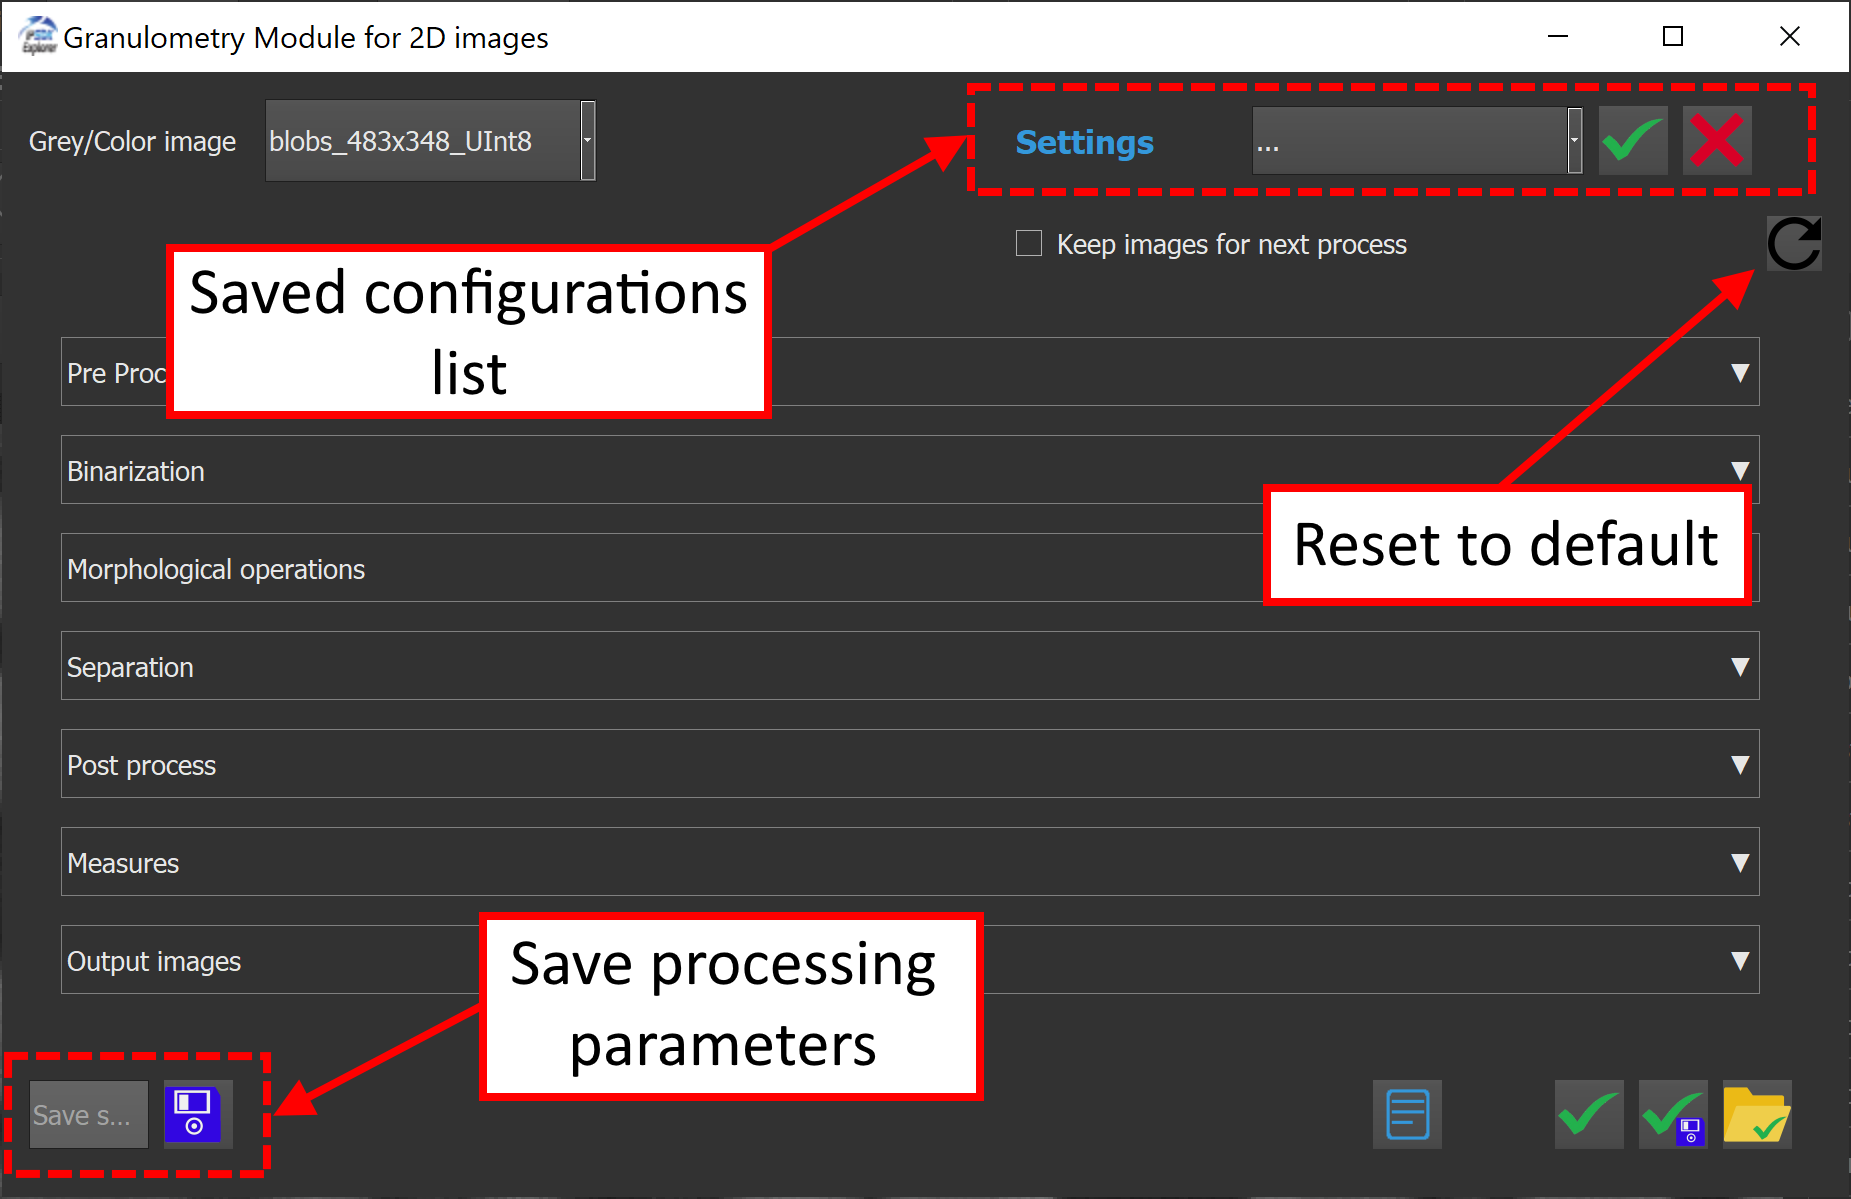
The second dropdown menu appearing on the right corner allows to choose and reload previously saved configurations. The special entry "..." refers to the last auto-saved configuration made during the last preview.
| Buttons | Description |
|---|---|

| Apply the settings to the different processing sections |

| Delete the current setting selected in the list |

| Import saved settings |

| Export saved settings |

| Save current configuration |

| Reset all the settings to default values |
The checkbox Keep images for next process is an optional setting that allows to keep processed images in memory for the next process, and therefore gain some time during computations. When this option is checked, the last previewed image will be saved in memory, reducing redundant computations.
To save the current configuration :
The core of the plugin window includes seven distinct and collapsible processing sections :
Each processing section is made up of individual functions.
Each line is described as follows :

Here is an example with the pre process section :

This section is intended to enhance image quality before fiber detection.
It includes:
Here's an example of pre processing :

This step converts the pre-processed image into a binary mask highlighting the fibers.
This section includes 5 thresholding methods, with 3 classical algorithms :
And also two advanced options :

Here is an example of a binarization using the Simple threshold method :


After clicking the edit button, a new window opens allowing to choose a threshold using the double slider at the bottom of the window.

When using the smart segmentation method, a pre-trained model is needed. The documentation shows how to build a smart segmentation model here.
The smart segmentation option allows to select a pre-trained model and to choose the model classes to use for the binarization.
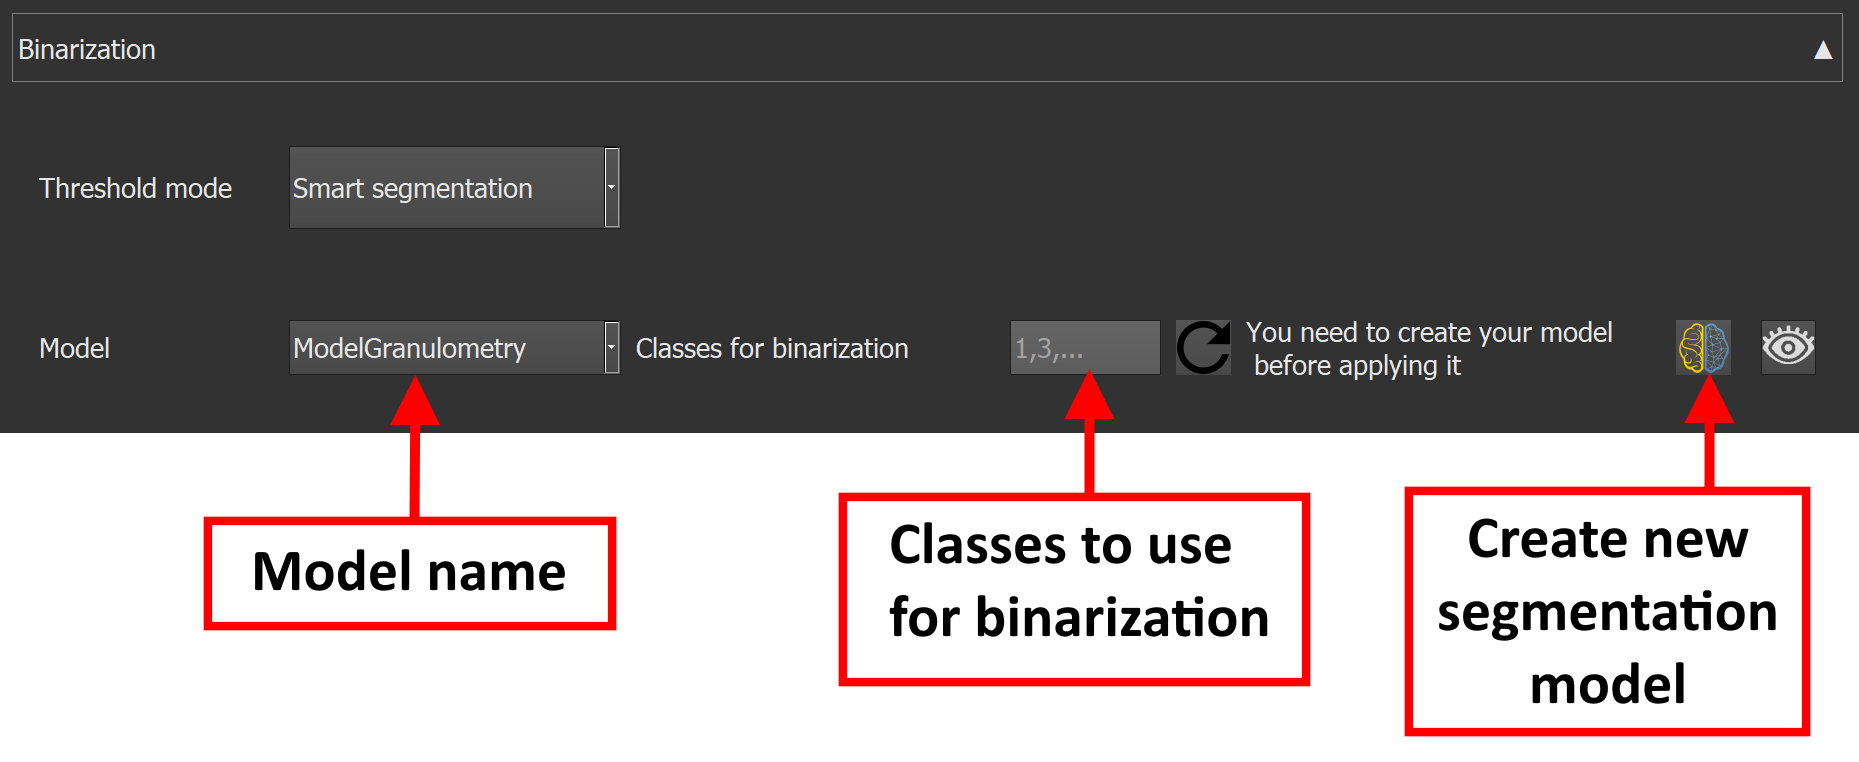
Here is an example of binarization using the smart segmentation method :

Besides the smart segmentation algorithm, the macro-based binarization can be usefull for very complex images binarization.
Binarization corrections refine the binary image by cleaning up artifacts and enhancing the detection of fibers.
Available operations are :
Each operation is optional and configurable.
Here's an example of binarization result using the corrections functions inside the plugin :

Fiber segmentation is performed here to label individual fibers for further analysis.
This section implements 5 different methods :

Here's multiple examples of the different methods with different parameters.
| Method name | Parameters value | Image example |
|---|---|---|
| Approximation polyline | 1 | 
|
| 4 | 
| |
| Skeleton min size | 5 | 
|
| 10 | 
| |
| Max curvature | 10 | 
|
| 25 | 
|
Additional parameters can be used here to reconnect the labeled fibers that are not connected.
This section implements the reconnection of fibers using 3 parameters :
Here is an example of fibers reconnection :

Here's examples of the angle tolerance method with different parameters.
| Angle tolerance | Distance tolerance | Example |
|---|---|---|
| 25 | 25 | 
|
| 90 | 25 | 
|
This section performs the reconstruction of segmented fibers using 4 different parameters.
The parameters are :
Here is an example of fibers reconstruction :

This section provides analysis of the segmented fibers.
The available measures are :

The preview button gives a peak of the results inside IPSDK Explorer.
A set of quantitative measurements is available within this section.
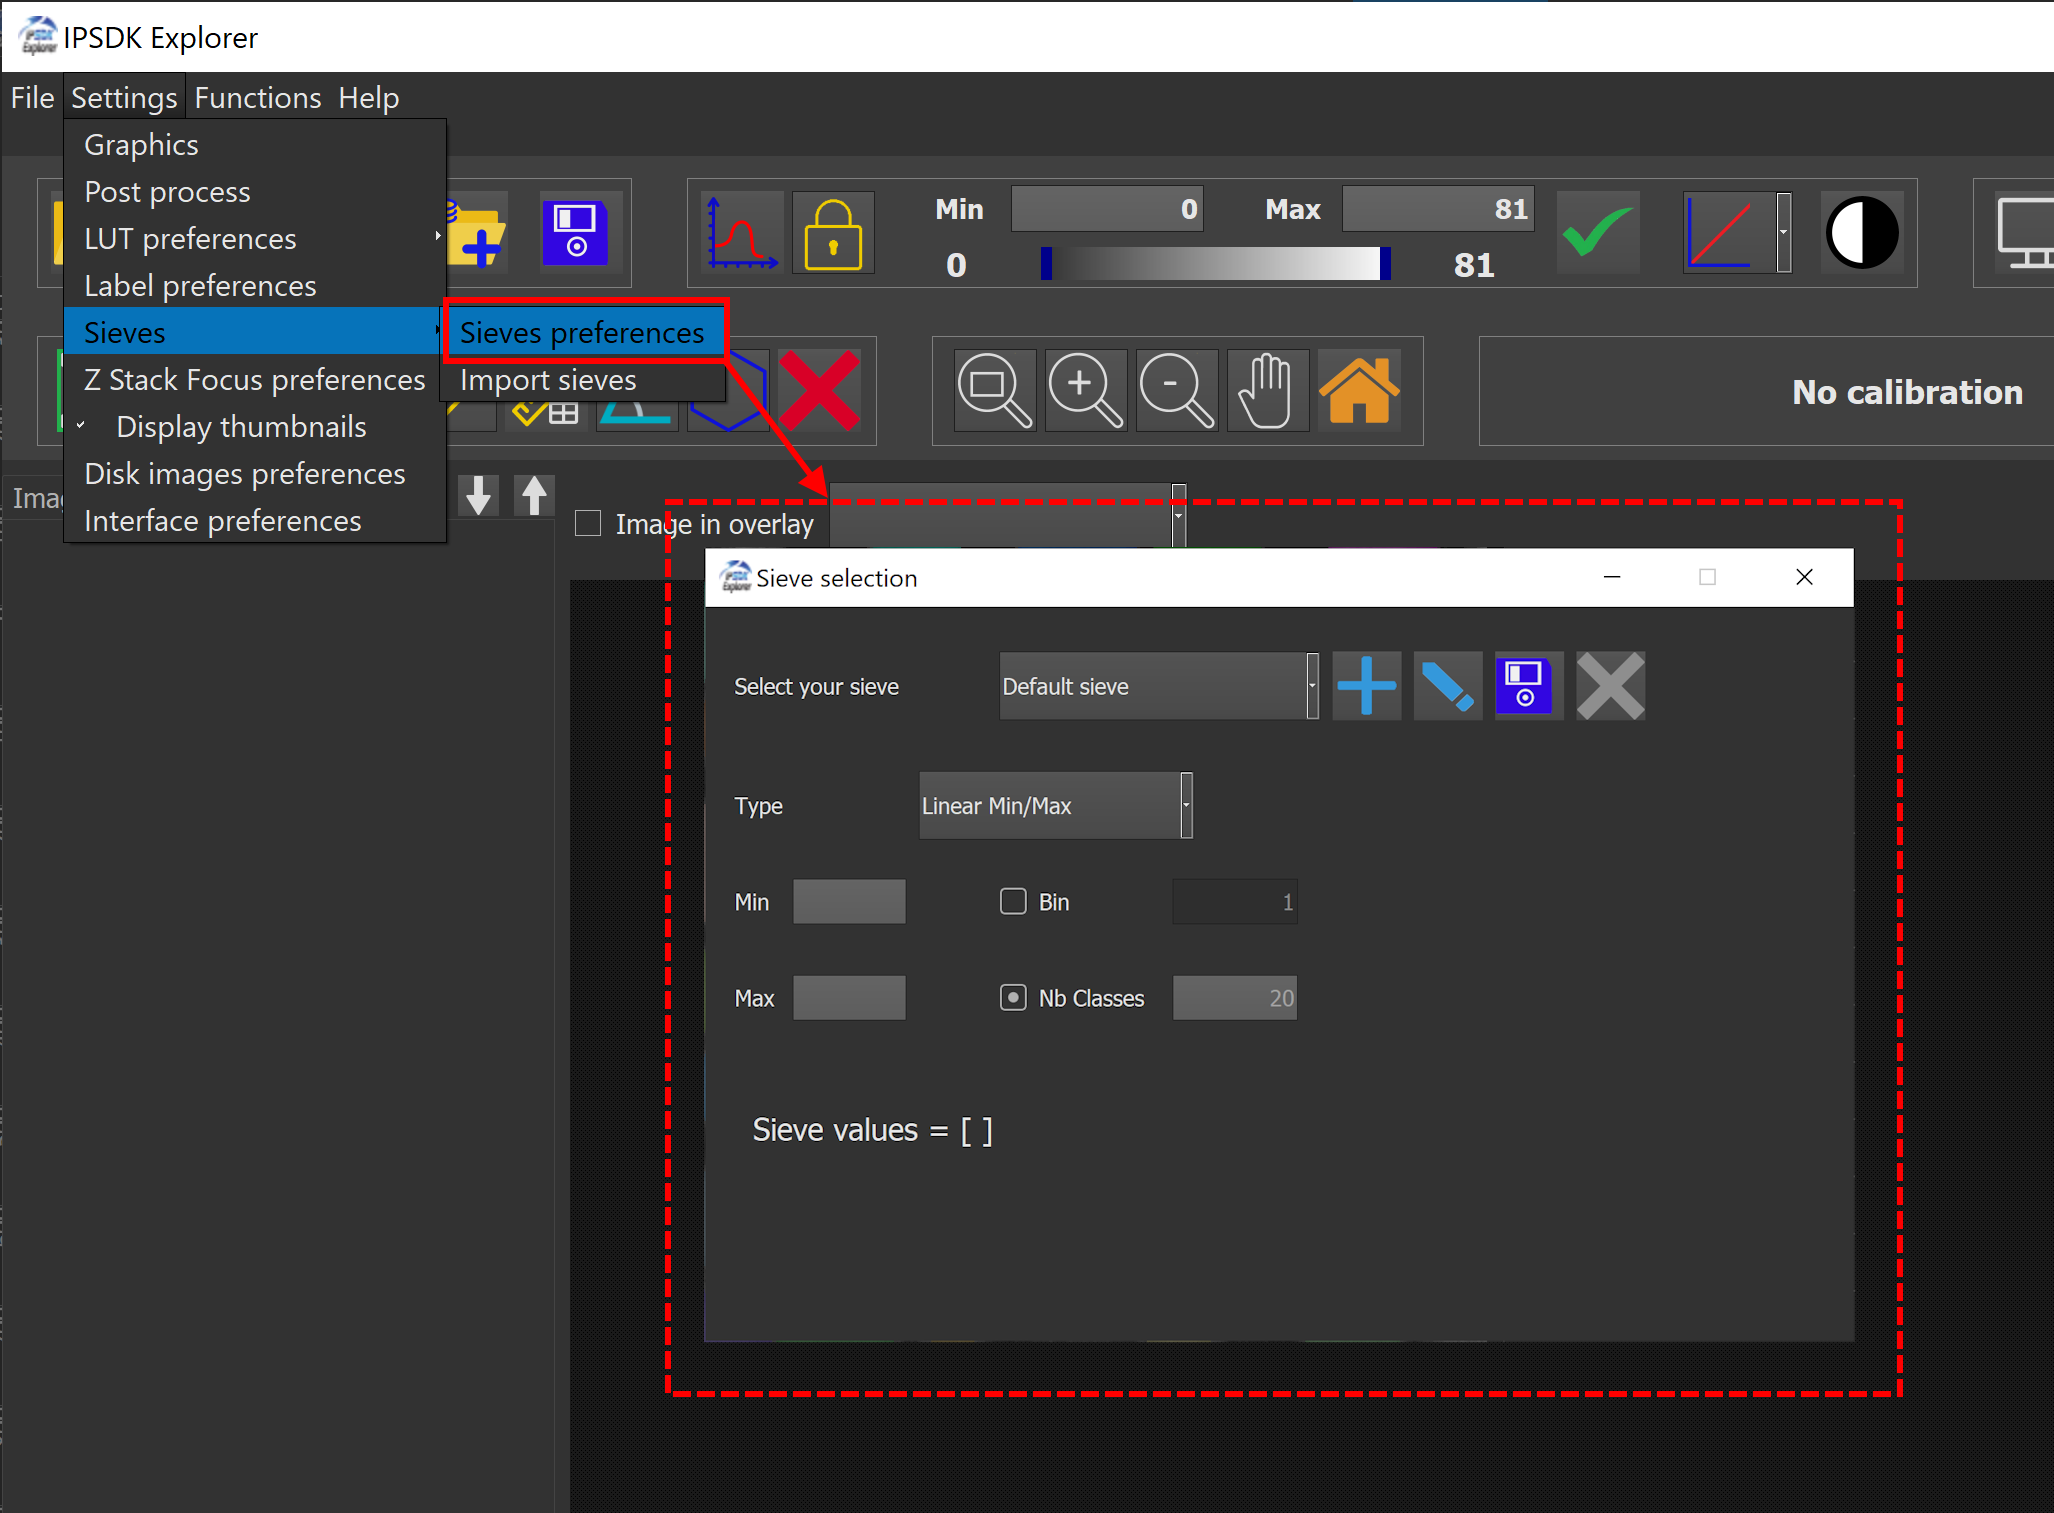
Sieves can also be customized under Settings → Sieves → Preferences.
At the bottom right, three buttons control the execution of the analyses :


Here's an example of display inside IPSDK Explorer when launching an analysis :

