 |
IPSDK 4.2
IPSDK : Image Processing Software Development Kit
|
|
IPSDK 4.2
IPSDK : Image Processing Software Development Kit
|
This module allows to classify shapes on a labeled image.
To achieve that, the user can classify some of the shapes by clicking on the image.
A random forest model will then be trained using those shapes.
Once the model is trained, it can be applied on the complete image, or on similar images.
Here we have the graphical interface on this module :
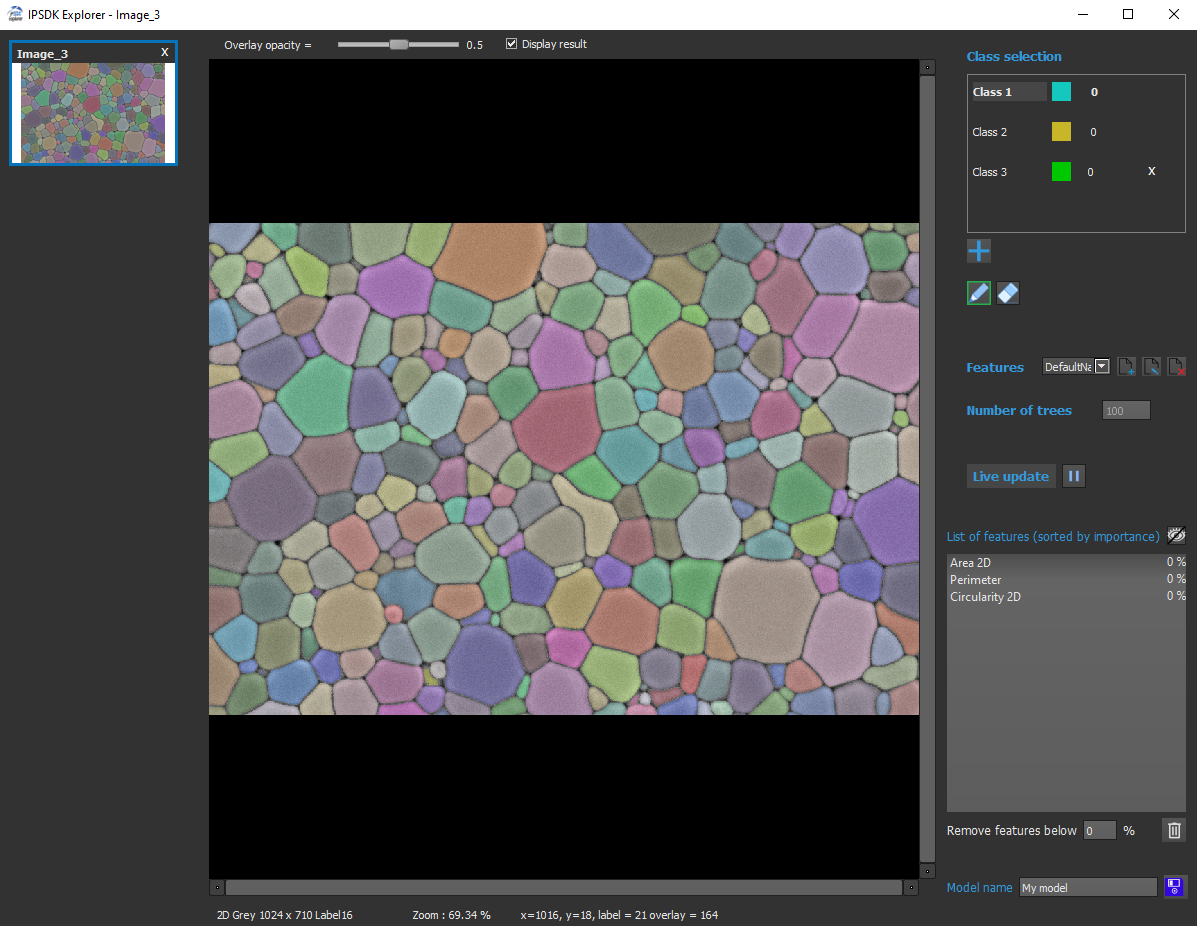
The class selection box contains all the information concerning the classes of the model.
The user can add or delete a class, and can change the color used to visualize a class.
It is possible to change the selected class by clicking on it.
Once a class is selected, the user can add shapes to this class by clicking on the image.
If the eraser button is activated, clicking on the image will remove the shape from the selected class.
The number on the right of each class indicates the number of shapes contained by this class.
Then the user can choose the features for the model.
Here the features correspond to the measurements on the shapes.
It is possible to apply an existing infoset to compute the measures, or to create a new one.
If some measures from the Intensity category are selected, an intensity image (grey or color) is needed to obtain meaningful results.
Here we have the widget used to define the infoset :
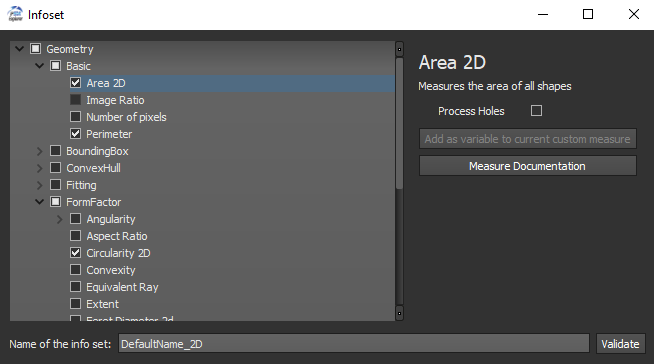
The list of features box shows all the features used in the model.
By clicking on a feature, the user can visualize it with a color LUT.
To stop displaying a feature, the user can click on the eye button.
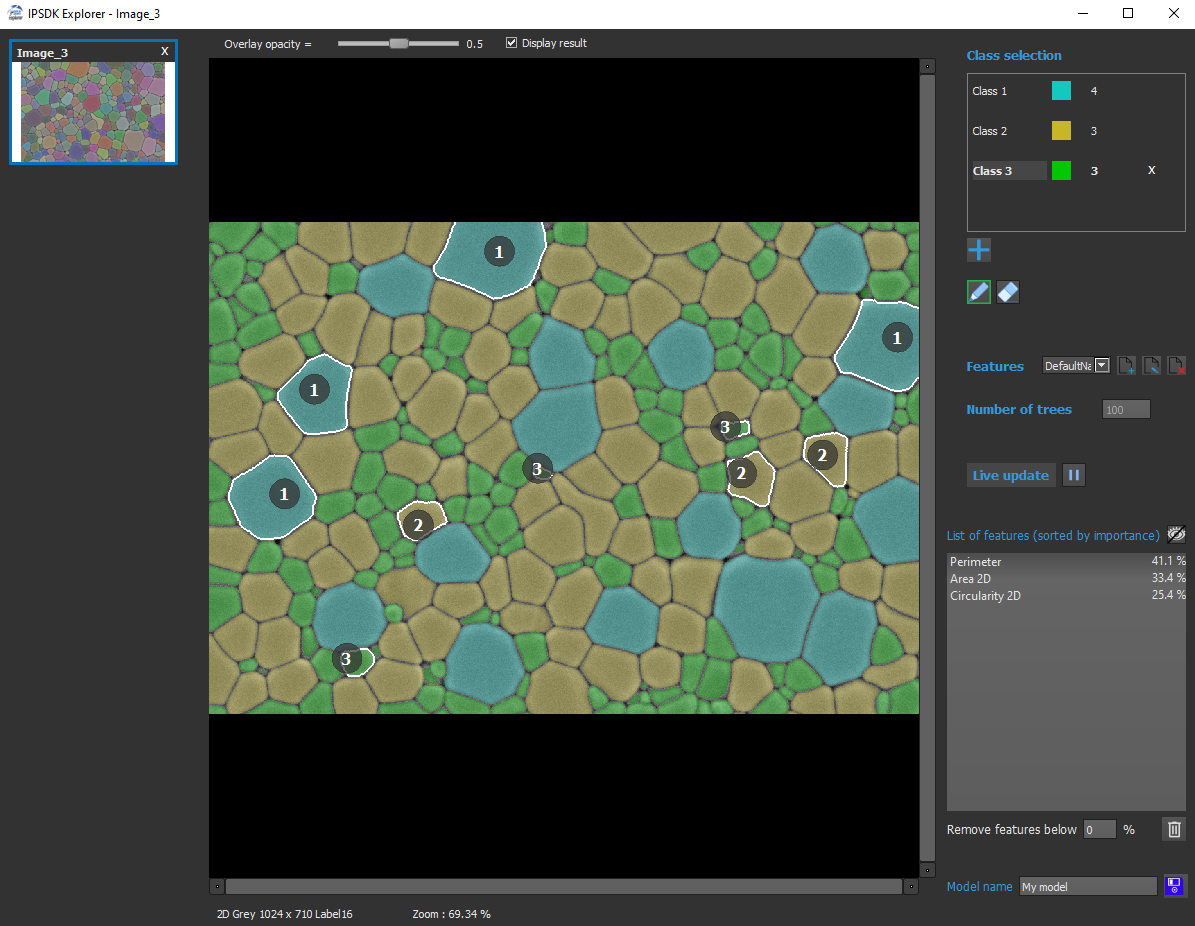
Once the model is computed, each features will have an associated percentage, which shows how much a feature impacts the model.
The functionality "Remove features below" allows the user to remove the less meaningful features.
To do so, the user choose a threshold in percentage, and click on the trash button.
The infoset widget will be updated automatically.
The user can also change the number of trees used in the random forest model.
With more trees, the model will be more precise, but the computation time will be longer.
It is also possible to activate or deactivate the 'live update' mode.
If this mode is activated, the model will be actualized every time a shape is added to a class, or removed from a class.
If this mode is deactivated, the user can actualize the model manually.
Here we have an example of a model with 3 classes. The features used to compute this model are : Perimeter, Area 2D and Circularity
Once the user is satisfied with his model, he can save it and use it in the Explorer interface.
